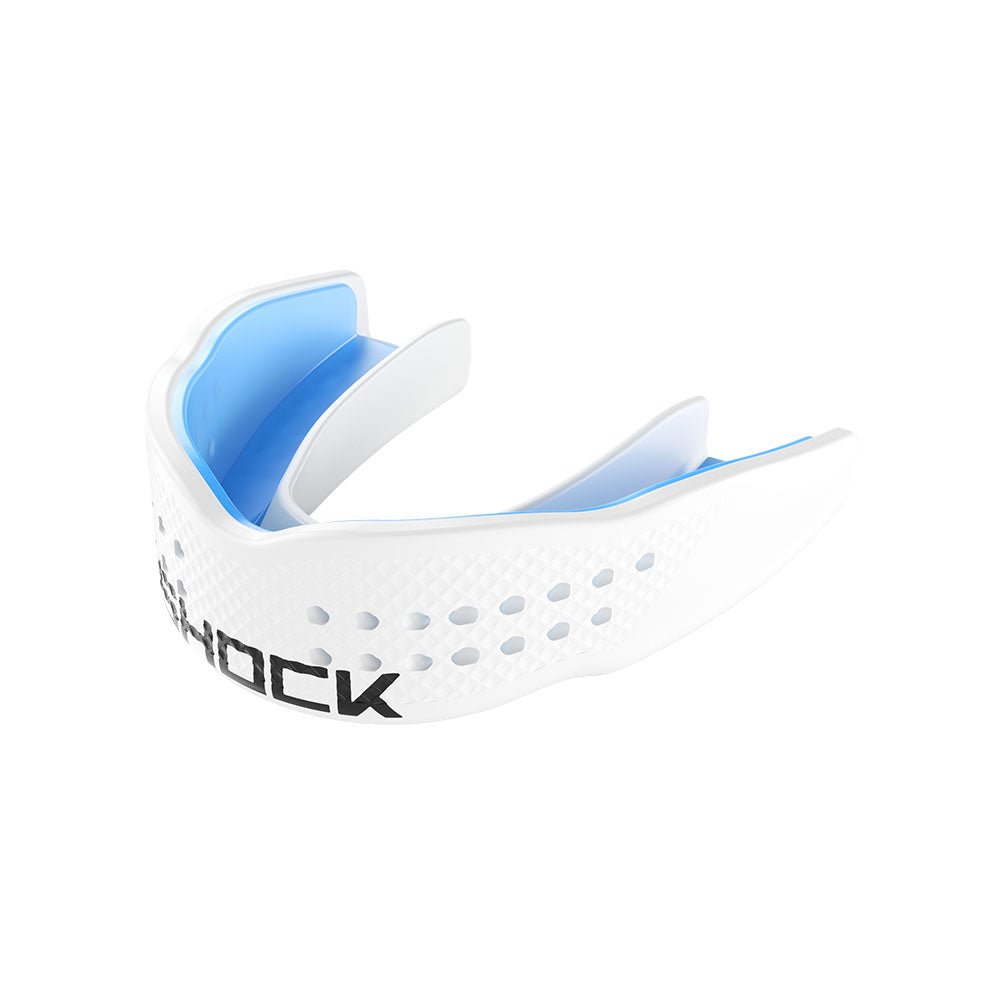
Communicate better with highly breathable and speak-able InVent tech.
Developed to handle the hard court, hard elbows and hard shots of basketball and other impact sports.
Sink into full coverage, ultra comfort and easy fitting….aka Super
– InVent tech for breathability & speakability
– Bio-Fit design
– Gel windows add shock absorption
– Gel-Fit Liner
– Low-temp fitting
NO BOIL – LOW HEAT FITTING INSTRUCTIONS
NOTE: The mouth guard has a very tight and close fit. The advanced material softens to a firm putty-like consistency that provides ample time to manipulate and form to the teeth.
Take Your Time and Don’t Rush.
1. Heat water to 150F
• Heat 16 oz water on stove, in sauce pan DO NOT BOIL, and pour 12oz into glass measuring cup – OR –
• Heat 16 oz water in glass measuring cup in microwave pour out approx. 4oz. to result in 12 oz.
• Fully Immerse Temp Strip in water. It can be trimmed with a scissor at the 100 degree mark to fit more easily in container). A thermometer can also be used
• Mix in small amounts of room temp water to cool hot water to lower the temperature
• Non-Flavored Mouth guard: 150 temp indicator is Green/Gold in color, or about 145 degrees
• Flavor Fusion Mouth guards: 140 temp indicator should be Green/Gold in color, or about
135-140 degrees
• Remove Temp Sensor Strip from water
2. Place Mouth guard in warm water
• Insert mouth guard, facing up, into warm water at bottom of container
• Wait about 35 – 45 seconds, and gently remove. (use a spoon edge to slightly move mouth guard in water after 30 seconds to avoid it sticking to bottom) Notice that Mouth guard sidewalls and shape at the front of the mouth guard have relaxed.
• Remove mouth guard from warm water. Handle gently as mouthguard will be very pliable. Make sure soft walls are straight and the arch channel is clear for fitting onto teeth
• Do Not Rush. You have time to get a great fit
3. Placing and fitting mouth guard correctly
• While facing mirror carefully Center and Align mouth guard on upper arch of teeth
• First, press inside rim of mouth guard into back of front teeth and roof of mouth and side of teeth
• Second, push up on bottom of mouth guard along all teeth then slowly bite down with front teeth into front channel to initiate custom impression. Do Not bite hard or you could bite through soft material
• Third clench teeth slowly together, yet firmly, on the whole mouth guard and begin to suck out air and press tongue against inside rim of mouth guard.
• With fingers firmly press outside of front walls of mouth guard against front row of teeth and gums then close mouth and suck in air to create a vacuum and continue to compress mouth guard against all teeth and gums by pressing on outside of lips and cheeks
• Maintain pressing and compressing mouth guard against teeth and gums with firmer bite until mouth guard has started to harden. Keep in mouth for at least 4 minutes which allows for continual custom adjustment while material hardens.
• Drinking ice cold water and swirling around mouth guard after two or three minutes can speed hardening process while continuing to keep a vacuum effect by sucking in air.
• Remove and immerse mouth guard in ice cold water for three to five minutes and check fit. If not as tight a fit as desired repeat warming instructions, use Temp strip and immerse in 140 degree water for 30-35 seconds and repeat fit process.
MUST READ
Video Instructions on shockdoctor.com
If Temp strip shows no temp indication color then water is too hot.
DO NOT IMMERSE MOUTHGUARD IN TOO HOT WATER
ALWAYS protect mouth guard from heat environments such as hot dashboards and hot car interiors.
NEVER CHEW or DISTORT mouth guard which can damage it and reduce fit and effectiveness.
STORE at Room Temperature, preferably in a clean mouth guard case.
CLEAN and Rinse after each use.


